Ever sit down for turkey dinner and find it a bit dry? I've been there, and I'm here to share some simple, tasty tricks to keep your roast juicy every time. Think of it like giving your turkey a little spa day with careful temperature checks, the right prep, and some smart moves that really let the flavors shine.
Imagine turning a regular roast into a real feast with a crispy, golden finish and meat so tender it practically melts in your mouth. With these straightforward steps and easy tips, you'll say goodbye to dry turkey and hello to a centerpiece that brings everyone to the table. Ready to fire up the oven and make a turkey you'll never forget?
Essential Turkey Roasting Steps and Temperature Control
Start by setting your oven to 325°F. This simple step makes sure your turkey cooks evenly from the very beginning. Before you roast, take out the neck, giblets, and any gravy packets from the cavity, you can save these for a flavorful stock or gravy later, much like cleaning your workspace before diving into a big project.
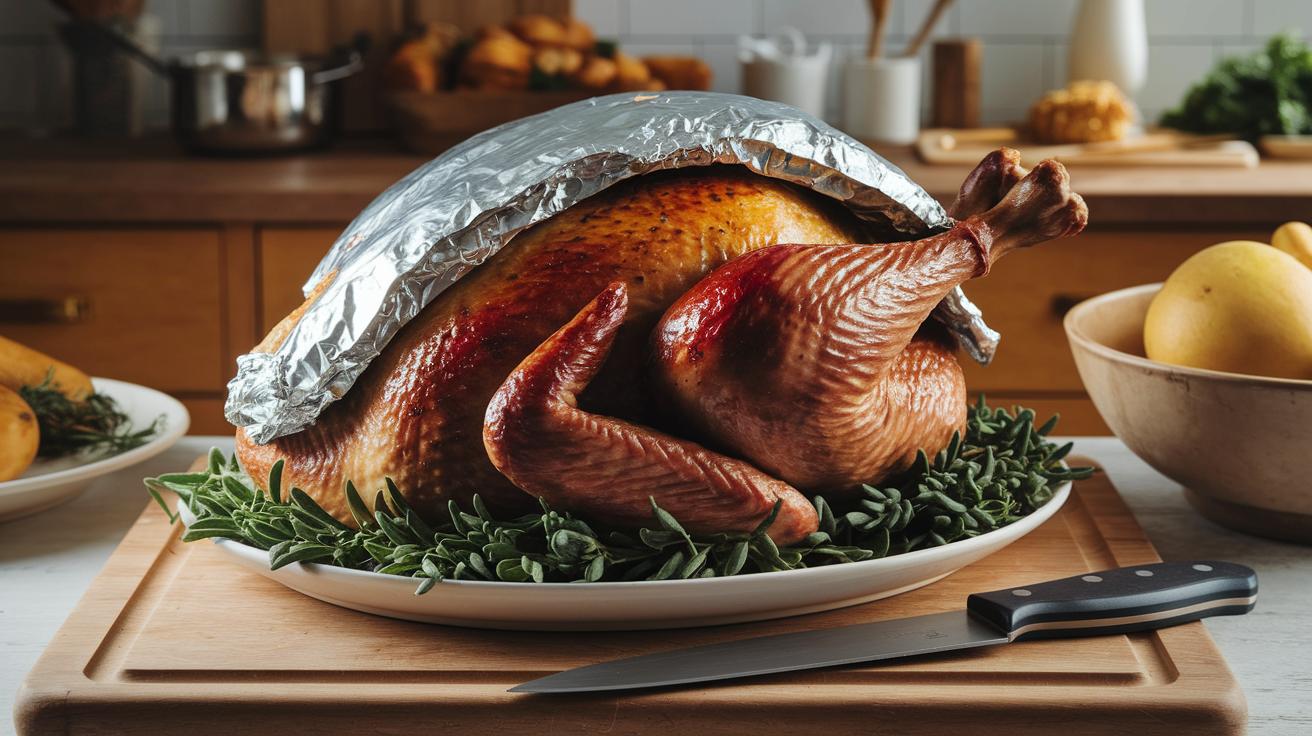
Set the turkey, breast-side up, on a rack in a shallow roasting pan. The rack helps the heat move all around the bird, and the pan catches those tasty drippings that make a great base for your gravy. For the first hour, cover the turkey loosely with aluminum foil to keep it moist. Then, after that first hour, take off the foil so the skin can turn nicely golden and crispy, imagine that satisfying crunch you get from a perfectly toasted slice of bread.
If you notice uneven browning, you can move the pan around or switch its position in the oven. Every 30 to 45 minutes, spoon the turkey’s own juices over it, much like stirring a simmering sauce to bring out its best flavor. Think of it as giving your bird a gentle spa treatment that keeps it juicy.
When you reach the midway point of cooking, use an instant-read thermometer to check the turkey's temperature. Stick it into the thickest part of the thigh and look for about 180°F, then check the breast, which should hit around 165°F. Clear juices are a sure sign that your turkey is cooked perfectly and safely.
For a 12–15-pound turkey, plan on roughly 2½ to 4 hours of roasting time. Remember, it’s best to trust your thermometer readings rather than just the clock. If your turkey starts browning too fast, feel free to cover it with foil again for 10 to 15 minutes to slow things down a bit.
In the final 45 to 60 minutes, take off the foil completely. This lets the skin develop a beautiful, golden-brown crust that rivals the crunch of a perfectly baked bread. Picture slicing a turkey with a crisp outer layer and tender, juicy meat inside.
Once done, let the turkey rest, loosely covered with foil, for about 30 minutes before carving. This resting time lets the juices settle into every slice, just as letting freshly baked bread cool helps lock in its flavor.
Plan for about 1–1.5 pounds of turkey per person. Follow these steps with care, manage the temperature well, baste regularly, and give the bird a proper rest, and you'll have a delicious, safe, and juicy centerpiece for your feast. Enjoy the process and savor every moment of your culinary journey!
Turkey Thawing & Preparation Advice

Start by planning how you'll thaw your turkey. Let it sit in the fridge for about one day for every 5 pounds you have. If you're in a hurry, you can submerge it in cold water and change the water every 30 minutes. Think of it like giving your turkey a little spa treatment, about 30 minutes per pound keeps things safe and even.
Before cooking, take your turkey out of the fridge about an hour ahead of time. This helps the meat come to room temperature so it cooks evenly. Pat it dry really well, like you're gently drying off a freshly washed dishcloth. That extra step helps the skin crisp up nicely when you roast it.
While you're prepping, set aside the neck, giblets, and any gravy packet. These little bits are great for making a rich stock, a tasty stuffing, or an all-star gravy later on. And don’t forget: wash your hands, your knives, and all the kitchen tools (even the thermometer) after handling raw turkey. Keeping everything clean is key to a safe and delicious meal.
Brine Process Overview for Moist, Flavorful Turkey
Brining is a game changer when it comes to keeping your turkey juicy and bursting with flavor. Whether you choose a wet or a dry method, both work to tenderize the meat and deepen its taste. With a wet brine, you mix water, salt, and sugar, letting your bird soak in the solution for 12 to 24 hours. Add some citrus slices or herbs for a zesty twist, it’s like a little spa day that leaves your turkey feeling refreshed.
If you’re after a simpler route, a dry brine might be your best bet. Just rub salt and your favorite seasonings right under the skin and let it rest for the same 12 to 24 hours. This approach not only locks in moisture but also gives the skin a beautiful, savory crisp that pairs perfectly with the tender meat inside.
| Wet Brine Ingredients | Dry Brine Method |
|---|---|
| Water, Salt, Sugar, Optional citrus slices or herbs | Salt and your favorite spices rubbed under the skin |
Even if you decide to skip the brining step, knowing these methods gives you insight into how to keep your turkey moist and full of flavor. Enjoy experimenting and savor every bite!
Herb-Infused Marinade and Seasoning Techniques for Turkey

If you’re after a turkey that’s bursting with flavor, start with a herb-butter marinade that feels like a warm hug. Soften some butter until it’s smooth and spreadable, then mix it in with freshly minced garlic and a handful of chopped rosemary, thyme, and sage. Gently work this fragrant butter under and over the turkey skin, like you’re tucking in your favorite meal. This simple move locks in moisture and fills each bite with delicious herb goodness.
Next, whip up a spice rub by mixing your favorite dried herbs and spices. Rub this mix over the turkey and even slide some beneath the skin for extra flavor. Let the turkey sit out at room temperature for about an hour before it hits the oven so all those flavors can mingle. For a zesty twist, sprinkle a bit of citrus zest over the marinade, imagine the bright pop of lemon lighting up the dish. As the turkey roasts, drizzle a little extra of that infused butter over it to boost the flavor even more. Every slice reveals a tender, juicy meat with layers of herbs that make the meal unforgettable.
Smoked & Deep-Fried Turkey Methods for Flavor Innovation
Smoking a turkey is all about inviting a deep wood-smoke flavor into every bite. Start by heating your smoker to about 225°F to 275°F and toss in your favorite wood chips. Imagine the air filling with the fresh, smoky aroma, the kind of scent that makes you smile as it slowly penetrates the meat. The result is turkey so tender and juicy, it practically melts in your mouth.
Deep-frying, on the other hand, offers a totally different experience. Preheat your oil to 350°F in a dedicated fryer and be sure the turkey is completely dry (this keeps those dangerous splatters at bay). Lower the bird slowly and carefully, always keeping a safe distance. You’ll soon get that wonderfully crispy, golden exterior that gives way to moist, flavorful meat underneath, creating a delicious contrast you won’t forget.
Both techniques bring their own unique flavor and texture, inviting you to experiment and create a holiday feast full of memorable, mouthwatering moments.
Alternative Turkey Cooking: Sous-Vide, Pressure & Low-and-Slow
If you're ready to mix things up with your turkey, consider trying techniques like sous-vide, pressure cooking, or the classic low-and-slow method. Imagine sealing your turkey in a bag and cooking it gently at 145°F for 4 to 6 hours using sous-vide. After that, a quick roast or broil gives it a crisp, golden skin while keeping all the juicy, rich flavor locked inside.
If you're short on time but still want tenderness, a pressure cooker is the way to go. It speeds things up without sacrificing the moist, melt-in-your-mouth feel that slow cooking delivers. You get that deep, homey texture even if you're in a bit of a hurry.
For those who love a traditional approach, the low-and-slow method is a real winner. Set your smoker or oven to 225°F and let the turkey cook for 6 to 8 hours. A little foil tent here and there helps keep it moist as it slowly develops a deep, savory flavor that feels like a warm hug.
Feel free to experiment with these methods whether your turkey is partially frozen or you're just cooking the breast. Enjoy the creative process and savor every delicious bite!
Turkey Carving Expertise and Resting Guidelines
Let your freshly roasted turkey chill under a loose foil tent for about 30 minutes. This little wait lets the juices spread out so every bite stays moist and full of flavor. Meanwhile, the turkey finishes cooking gently, which makes carving a breeze and ensures it's served just right. Imagine the rich, savory aroma dancing around your kitchen, it's a true prelude to the feast.
When you're set to carve, grab your trusty, sharp chef’s knife. Start by slicing the breast meat into neat, even pieces, then gently work on the thighs and legs with steady cuts that show off your carving skills. A few simple kitchen tools, a quality knife, a solid carving board, and some paper towels to catch any extra drips, really make all the difference.
And don’t forget, serving temperature is key. Pull the turkey from the heat right on time and keep those flavorful pan drippings handy for a delicious jus. Enjoy every step of the process and savor the sight of each tender, juicy slice ready to delight your guests.
Troubleshooting Turkey Cooking: Real-Time Adjustments

Watch your turkey as it cooks and stay alert for any surprises. If you see a sudden drop in temperature, like when your oven cools off unexpectedly, take a moment to check the calibration. When the turkey cools faster than you’d like, tweak the heat or shift it to a cozier spot; even a small change can make all the difference.
If the skin starts to brown unevenly or too quickly, try draping a sheet of foil over the top. This little trick helps even out the color while keeping the meat nice and juicy.
When it comes to stuffing, you might run into a few bumps. It’s often best to cook the stuffing on its own and then toss it with the turkey right before serving. This way, you keep things safe and the texture just right.
- Keep a close eye on the turkey during the roast.
- Adjust the heat or cover with foil as needed.
- Prepare and cook stuffing separately to avoid any issues.
And don’t forget to use an instant-read thermometer to make sure every part of your turkey reaches the proper temperature. This helps ensure your meal is both safe and bursting with flavor every time.
Turkey Cooking Guides: Enjoy Juicy Results
For every guest, plan on about 1 to 1.5 lbs of turkey so you have plenty left for fun, inventive dishes. Picture turning those leftovers into a hearty sandwich loaded with crisp lettuce and a bright, tangy mustard kick, each bite giving you that satisfying crunch.
Next, try stirring chopped turkey into a warm, comforting soup or tossing it with fresh, seasonal greens for a light salad. For a playful twist, roll turkey slices into soft tacos paired with a zesty salsa and creamy guacamole, or mix them into a cozy casserole layered with veggies and bubbly, melted cheese.
And don’t forget the pan drippings! Instead of letting them go to waste, simmer them down to create a rich stock or savory gravy. Drizzle this over mashed potatoes or a warm bread pudding for an extra burst of flavor. Every idea turns your turkey leftovers into a culinary adventure, keeping the deliciousness alive long after the main feast.
Final Words
In the action, we dived into essential turkey roasting steps, safe thawing methods, and brine processes that lock in moisture and flavor. We explored herb-infused marinades, smoked and deep-fried techniques, and even unconventional sous-vide, pressure-cook, and low-and-slow methods. Practical carving tips, troubleshooting safety measures, and creative ideas for leftovers rounded out our guide. With these turkey cooking guides, you’re set to craft an impressive, delicious meal that turns everyday cooking into a memorable culinary adventure. Enjoy experimenting and savoring every bite!
FAQ
What do turkey cooking times and temperatures entail?
Turkey cooking times and temperatures set the guidelines for safe, even roasting. They help you know when to check internal temperatures of the breast and thigh, ensuring the bird is fully cooked.
What are the best turkey cooking guides for beginners?
The best turkey cooking guides offer clear, step-by-step instructions—from thawing and prepping to seasoning and roasting—making it easy for beginners to achieve a perfectly cooked and juicy bird.
How long should you cook a turkey based on its weight (per kilogram or per pound)?
Cooking times generally depend on weight, with about 13–15 minutes per pound at 325°F. Using a cooking time calculator or chart provides a quick reference for precise timing per kilogram or pound.
What do Butterball turkey cooking times recommend?
Butterball guidelines suggest steady roasting at recommended temperatures, with regular checks of internal temperature to maintain juiciness and flavor, while adjusting the time based on the bird’s weight.
Is it better to roast a turkey at 325°F or 350°F?
Roasting at 325°F allows for a slower, more even cook while 350°F can promote faster browning. The best choice depends on whether you prefer a more gently cooked or quickly browned turkey.
Should you roast a turkey covered or uncovered?
Roasting covered initially retains moisture and prevents early browning, while uncovering during the last part of cooking helps achieve a crisp, golden skin for added texture.
Do you put water in the bottom of a roasting pan for turkey?
Adding water in the roasting pan can help prevent drippings from burning and keeps the oven moist, which supports even cooking and enhances the overall flavor of your turkey.
How do turkey cooking time calculators help in the roasting process?
Turkey cooking time calculators quickly estimate the total cooking time based on the bird’s weight and temperature settings, ensuring that you roast your turkey thoroughly and safely every time.